Making a Simple Link List for Sharing
We are all just a few minutes away from a nice and simple links page.

Why another page?
I knoooow, right? Another page. Don’t we already have a navbar and a footer, and goodness knows how many other pages. However, it is nice for making a simple navigation for sharing across the increasingly mobile web - and almost essential for Instagram. Okay, I was entirely motivated to start working on this because of Instagram, but then I saw other potential uses.
What we are creating here is just a page with a few links to key areas of your site that people are likely to want to self-direct after seeing something else about you. I’ll assume it is your Instagram feed. Just place the link for whatever you end up coding in your Instagram bio as your website. Use the same idea here to add temporary links for discounts or current blog posts, or whatever folks might be looking for. :smiley:
How to code it up
Today, I whipped this up for two sites, this one in Jekyll, and my other site using EJS and Express. Since the setup for both was pretty straightforward but very different, I will share both here.
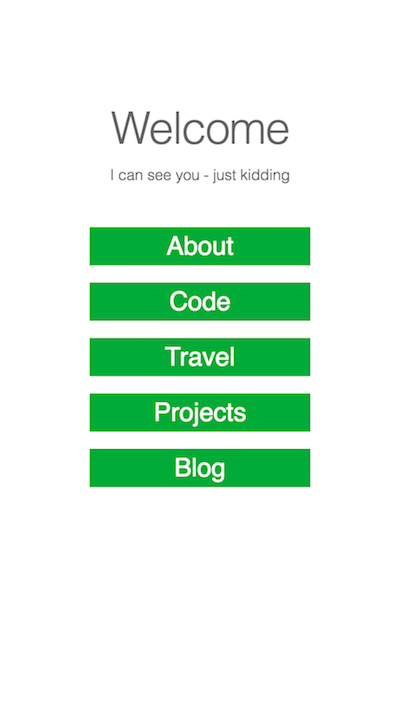
The end result (I’ll probably keep fiddling with them) looks something like this on mobile.

Jekyll Markdown
This blog that you are reading right here is written in jekyll with markdown. To set up a clean links page, I had to create a new layout and one new page.
I needed a new layout because I did not have any existing layouts that would center everything on the page and not print the header and footer of my typical pages.
/layouts/plain.html
<!DOCTYPE html>
<html>
  {% include head.html %}
  <body>
    <div class="page-content">
      <div class="wrapper">
          <header class="post-header center">
            <h1 class="post-title">{{ page.title }}</h1>
            <h5 class="post-description">{{ page.description }}</h5>
          </header>
          <div class="center">
            {{ content }}
          </div>
      </div>
    </div>
  </body>
</html>
The markdown needs to include YAML to indicate that we are using our new plain layout, a title, link and description. I also have a nav tag that is false if the page should now show up in the main navigation. Whether or not you need that depends on how your navbar and header is already coded.
/pages/links.md
---
layout: plain
title: Welcome
permalink: /links/
description: I can see you - just kidding
nav: false
---

[About]({{site.url}}/){: .button .mylink}

[Code]({{site.url}}/code){: .button .mylink}

[Travel]({{site.url}}/travel){: .button .mylink}

[Projects]({{site.url}}/projects){: .button .mylink}

[Blog]({{site.url}}/blog){: .button .mylink}
I don’t typically have css in my markdown pages, but I could not quite get the button look that I wanted without adding the css. If you use buttons more frequently in your jekyll site or plan to, this links page could go to a layout that loops over each link and creates a button instead. The exact css settings that I have here are:
/* in /_sass/basscss/_base-buttons.scss */

button,
.button {
  font-family: $button-font-family;
  font-size: $button-font-size;
  font-weight: $button-font-weight;
  text-decoration: none;
  cursor: pointer;
  display: inline-block;
  box-sizing: border-box;
  line-height: $button-line-height;
  padding: $button-padding-y $button-padding-x;
  margin: 0;
  height: auto;
  border: 1px solid transparent;
  vertical-align: middle;
  -webkit-appearance: none;
}

::-moz-focus-inner {
  border: 0;
  padding: 0;
}

.button:hover {
  text-decoration: none;
}

/* in /_sass/_me.scss */

.mylink {
    background: $theme-color;
    color: #fff;
    font-size: 1.5em;
    width: 75%;
    align-self: center;
    text-align: center;
}
EJS/HTML/Express
I maintain the Gifts Done site with EJS and HTML with Express. The code for that was a different sort of straightforward. First, create a links page. I’m using EJS with views and pages. I’ll not post the long headernonav file but it is just the head meta and the start of the body tag. For this site, I am using Bootstrap 4, so I did not setup any special styles, the links are just part of a list-group.
/views/pages/links.ejs
<% include ../partials/headernonav %>

<div class="tall">
    <div class="px-3 py-3 pt-md-5 pb-md-4 mx-auto text-center">
        <a class="navbar-brand brand-logo" href="/">
        <img src="/images/gifts-done-name.png" alt="gifts-done logo"/></a>
        <p class="lead">Automate your Gifting!</p>
        <div class="container list-group py-3">
            <a href="/" class="list-group-item list-group-item-action">Learn More</a>
            <a href="/about" class="list-group-item list-group-item-action">About Us</a>
            <a href="/users/login" class="list-group-item list-group-item-action">Log In</a>
            <a href="/suppliers" class="list-group-item list-group-item-action">Become a Supplier</a>
            <a href="http://blog.gifts-done.com" class="list-group-item list-group-item-action">Our Blog, The Wrap </a>
            <a href="/faq" class="list-group-item list-group-item-action">FAQs</a>
            <a href="/contact" class="list-group-item list-group-item-action">Contact Us</a>
        </div>
    </div>
</div>

<!-- footer -->
<footer class="footer white py-5">
    <div class="container py-3">
        <div class="footer-copyright row d-flex justify-content-center align-items-center">
                    <div class="col-2 brand-logo">
                    <img src="/images/gifts-done-logo.png" alt="gifts done automatic delivery"/></div>
                    <div class="col-9 brand-logo"><p>Made with ♥ by gifts-done</p></div>
        </div>
    </div>
</footer>
<script src="https://maxcdn.bootstrapcdn.com/bootstrap/4.0.0/js/bootstrap.min.js" ></script>
</body>
</html>
The thing to remember in this situation is that you can’t just create the page. You also need to add a route so that when someone goes to http://yoursite/links/ the server will know that you want to serve up the links page that you made.
// routes/index.js
const express = require('express');
const router = express.Router();
const controller = require('../controllers/index');
// IG LINKS
router.get('/links', controller.show_links)
// .. a bunch of other router stuff

// controllers/index.js
// .. other controller stuff
exports.show_links = (req, res, next) => {
    res.render('pages/linkpage',{ page: 'landing'} );
};
Happy Listing - you can see this code in action on my Instagram Feed and the Gifts Done Instagram Feed